How to Seal Stickers on Wood

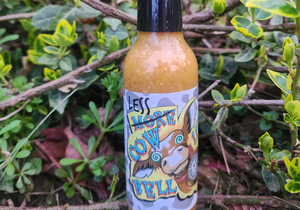
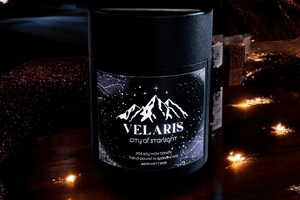
Custom stickers are a cost-effective and fun way to spruce up a space. From the transparent case housing your baked goods to the point-of-sale device at your checkout counter, these spots are perfect for showcasing your brand’s personality — and adding a pop of color – if that’s your jam.
However, applying stickers to wood surfaces like coffee shop counters and brewery tables requires a careful approach. The texture and porosity of wood demand the right type of sticker and precise application to ensure durability and visual appeal. Here’s how to ensure your stickers stay stuck to wood surfaces — and look good doing it.

Can Stickers be Sealed to Wood?
Absolutely! You can apply stickers to almost any surface, including wood, as long as it’s clean and dry. It's all about choosing the right materials for your stickers and following the right process so your decals not only stick, but stand the test of time.

What Stickers Can be Used on Wood?
Vinyl stickers shine as the best type of sticker to use on wood surfaces thanks to their flexibility and strong adhesive backing. But the surface and finish of the wood will determine whether a standard vinyl sticker will adhere or not. For example, smooth, non-porous wood surfaces with minimal texture allow for better adhesion than rough, untreated surfaces.
When a standard vinyl sticker doesn’t do the trick for your wood application, Stomp has your back. We can send you samples of various materials that have a stronger adhesive than our standard vinyl stickers. And with the right material, your decal is sure to stick around.
How to Seal Stickers on Wood
Sealing stickers on wood is a relatively easy process. Stick to these steps to make sure you get it right:
Design a Custom Vinyl Sticker
Kick off your project by designing a custom vinyl decal that represents your brand. Whether it’s a logo, a catchy phrase, or an intricate design, the right sticker can elevate the look of any wooden surface. Use color schemes and fonts that illustrate your brand’s personality and match your brand’s aesthetic.
Prep the Wood Surface
The key to a long-lasting stick is all in the prep work. Make sure you clean your wood surface with a damp cloth to remove any dust or dirt — and don’t forget to thoroughly dry it. Remember, since the wood surface is already porous, there’s less for the sticker to grab onto; if it’s also dusty, it may quickly lose its grip. If the wood is unfinished or has a rougher lacquer finish, a quick sanding using fine-grit sandpaper might be necessary.

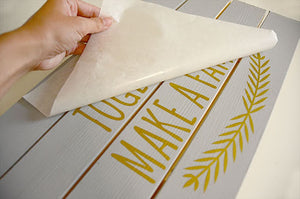
Apply the Sticker
Once your surface is ready, don’t just slap your decal on willy-nilly. Proper sticker application is part art, part science, and all attention to detail. After you gently remove the backing paper from your sticker, hold the sticker by its edges to avoid any fingerprints. Next, position it over the surface where you want to apply it.
Once you’re satisfied with the placement, you can set one edge of the sticker down and slowly smooth it out from the applied edge to the opposite side, pushing out air bubbles as you go. And if pesky air bubbles emerge anyway, check out our blog on how to get bubbles out of stickers.
Apply Sealant
Protecting your decal is crucial to a long-lasting stick. That’s where sealants come into play. Mod Podge or a clear spray sealant (like polycrylic) acts as a protective layer to your sticker, shielding it from wear and tear.
Make sure you apply sealant evenly, and so it extends beyond the edges of the sticker for that seamless finish. Depending on the use and exposure of the sticker’s surface, you may need to apply additional coats of sealant. More layers equals more protection — just make sure you let each layer dry thoroughly!

Brush Glue Over the Wood Surface
For an extra layer of durability, brush a thin layer of clear glue over the entire wood surface. This step is optional but highly recommended for surfaces that will be handled frequently, like menu boards.
Let It Cure
This last step requires patience. To ensure the best adhesion and protection, you have to let the sealant cure completely. The curing process allows the adhesive to set and form an even stronger bond with the wood surface over time.
Check out the directions on your sealant label to determine how long it needs to cure — it could be several hours or a couple of days. And as your surface dries, make sure employees and patrons keep their hands off!
What to Avoid When Sealing a Sticker on Wood
If you follow the steps outlined above, you’re bound to have a successful sticker application. But beware because there are a few common pitfalls to avoid:
Sanding Smooth Wood
If your wood surface is already smooth, do not sand it — I repeat, do NOT sand it! Sanding smooth wood can actually make it less conducive to adhesion.
Using Low-Quality Wood
Poor-quality wood may affect adhesion and durability. Avoid applying stickers to porous wood or rough surfaces with uneven and textured surfaces that can’t be sanded down.
Not Being Cautious With Polycrylic
A clear, polycrylic finish can help protect your stickers from moisture and scratches, but you have to be careful. Polycrylic emits fumes, and direct contact with it can irritate your skin. Use protective gloves and an abundance of caution when handling polycrylic.

How to Seal Stickers on Wood: FAQs
Now, let’s get into some of your commonly asked questions when it comes to sealing stickers on wood.
How Do Vinyl Sticker Seal to Wood?
The adhesive used in vinyl stickers is typically made from acrylic or solvent-based compounds, providing a strong and lasting hold on wood surfaces. The adhesive on the back of vinyl stickers is also pressure-sensitive, meaning it activates and bonds more firmly when pressure is applied. Just make sure your wood surface is clean, dry, and smooth before application, and allow adequate time for curing post-application.
What Do You Use to Seal Stickers on Wood?
Mod Podge, clear spray sealant, and brush-on glue are excellent options to seal your stickers on wood surfaces. These sealants provide a durable layer that protects the sticker from peeling and the wood from environmental damage.
Can Stickers Be Sealed to Wood Permanently?
Yes, with proper application and sealing, stickers can become a lasting part of any wood item. The key is to use a reliable sealant and apply it according to the product's instructions for permanent results.
How Do You Waterproof Stickers on Wood?
Using a waterproof sealant like Mod Podge can protect your stickers from moisture and wear. Apply multiple thin layers, allowing each layer to dry thoroughly for maximum protection.
Do Stickers Come off Wood?
If properly sealed, stickers should not come off easily. However, unsealed stickers or those on untreated surfaces may peel or degrade over time, especially under harsh conditions.
What Can I Use to Seal Vinyl on Wood?
Look for sealants specifically designed for use with vinyl and wood for the best results. These products will ensure the vinyl adheres well to the wood and is protected from elements, making sure your vinyl sticker will remain in place for good.
Create Custom Vinyl Stickers with Stomp
Whether you’re looking to decorate a counter at your coffee shop or place signage around your retail store, branded vinyl stickers are the perfect way to jazz up the wood surfaces in your small business. From crafting the perfect sticker to ensuring it lasts on any wooden surface, Stomp is here to guide you every step of the way.
Get in touch with our support squad to test sticker samples and find the perfect material for your application.
- Nashira Edmiston