How to Get Bubbles Out of Stickers
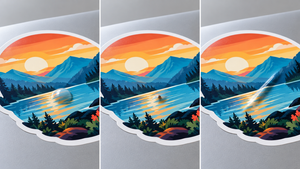

A pesky sticker bubble can ruin your sticker design and make it look unprofessional. Luckily, sticker bubbles can often be fixed, but the best approach depends on what's causing the bump and how severe it is. Getting air bubbles out of stickers can usually be done by gently smoothing the trapped air toward the nearest edge. But dirt, wrinkles, and adhesion issues need a different solution. And trust us, pressing harder on the bubble won't help!
We'll walk you through how to get bubbles out of stickers, starting with the least invasive method. Here's what to try, what to avoid, and how to prevent those annoying bubbles in the future. Let's burst your bubble troubles!
Quick Jumps for Busy Humans
Why Do Stickers Get Bubbles?
You thought you did everything right, but the bubble still showed up. So where did it come from?
Air can become trapped during the sticker application process, forming a bubble. It's possible too much of the adhesive surface was pressed down all at once. Or instead of air, there could be dirt or debris between the sticker and the surface. Maybe the application was uneven, or maybe what you think is a bubble is actually a wrinkle or crease.
In short, there are a lot of reasons that bump may be there. Figuring out what's causing it is the first step toward fixing it.
How to Remove Bubbles From Stickers
There are a few different ways to remove sticker bubbles, but not every method is meant for every bubble (or sticker material). Here's a step-by-step process for getting air bubbles out of stickers, starting with the safest, least invasive options!
Step 1: Test the Bubble First
Before doing anything, test the bubble by lightly pressing on it with your finger. If it moves or feels like trapped air, the bubble can likely be fixed by gently working the air toward an edge. But if the bump feels hard and doesn't move, it's more likely a piece of debris stuck between the sticker and the surface. It could also be a wrinkle, crease, or uneven spot on the application surface. Removing trapped debris may require lifting an edge of the sticker, if possible. Be careful, though. Lifting an already applied sticker can weaken its adhesive bond or damage the material.
Step 2: Start by Smoothing the Bubble Toward an Edge
The easiest and least invasive way to release air bubbles involves slowly working out the trapped air.
Use a credit card or another smooth plastic card to gently apply pressure near the bubble, then slowly move the trapped air toward the nearest edge of the sticker. Don't press down hard! Use light, steady strokes. A squeegee can also help apply pressure evenly across the surface. If you're using a plastic card, place a soft, clean cloth between the card and the sticker to help protect the printed surface from scratches.
Stop if the sticker starts to stretch, wrinkle, lift, or show signs of damage.

Use light, steady strokes to guide trapped air toward the nearest edge without stretching or damaging the sticker.
Stomp Tip: Dealing with a stubborn bubble? Smoothing method didn't work? Double-check that you're dealing with an air bubble. Remember, a bump that's hard or doesn't move could be caused by debris or an uneven application surface. Or that raised spot could actually be a crease or wrinkle. It's also good to keep in mind that not every bubble can be fixed. Sometimes knowing when to stop is the best way to avoid making the problem worse.
Step 3: Should You Try Using Gentle Heat?
So you tried to smooth out a bubble to no avail, and you've determined it's not debris. You may be wondering whether bringing some heat into the situation could help.
A hair dryer is sometimes recommended for certain vinyl decal applications, but heat isn't a safe fix for every sticker material. Too much heat may stretch or distort the sticker, damage its printed surface, or affect the adhesive. Different materials and finishes can respond differently, so there's no one-size-fits-all temperature or technique.
If you're working with Stomp's custom vinyl stickers or another sticker material and aren't sure whether heat is appropriate, check with our Support Squad before trying it.
When in doubt, skip the heat. A stubborn bubble is annoying enough without turning it into a bigger problem.
Step 4: Should You Puncture a Sticker Bubble?
If the less invasive methods have failed you, you may be considering puncturing the bubble as a last resort. Some decal installation techniques involve using a fine needle to release trapped air. However, puncturing a sticker creates a permanent opening in the material, and the technique isn't appropriate for every sticker.
Keep in mind that puncturing a sticker bubble is not a fix-all. Creating a hole opens up the possibility of moisture or contaminants getting underneath the adhesive. The hole may also be visible or damage the sticker itself.
Before reaching for a needle, confirm that puncturing is appropriate for your specific sticker material. If you're unsure, contact Stomp's Support Squad for guidance. Sometimes the better move is to leave a small cosmetic bubble alone rather than risk permanent damage.
Will Sticker Bubbles Go Away on Their Own?
Sometimes small air bubbles may become less noticeable over time. But that's not always the case, and waiting doesn't guarantee they'll disappear.
What happens depends on the sticker material, adhesive, application surface, and what's causing the bubble. If the raised area is small and purely cosmetic, leaving it alone may be better than repeatedly trying to smooth it out. And waiting won't solve other issues that cause bumps.
If dirt, dust, or other debris is stuck underneath your sticker, it won't disappear on its own. You could also be dealing with creases, adhesion that has been affected, or raised spots caused by an uneven surface rather than trapped air. Before grabbing a credit card, blow dryer, or pin, it's best to determine why the bubble formed or if it's even a bubble at all.
How to Prevent Bubbles in Stickers
Prevention is always the best practice, so let's set you up with the tools needed to avoid bubbles in the future. Follow these steps next time you're applying a sticker:
- Start with a clean, suitable surface. Make sure the surface you're applying the sticker to is clean, dry, and even, with no dirt, grease, or debris.
- Position the sticker first. Before you remove the sticker backing, position the sticker exactly where you want it.
- Gradually remove the backing. Don't take it off all at once if the sticker's construction allows gradual application. If the backing has a backslit (a small cut), this process can be even easier.
- Smooth as you go. Lay down the sticker and smooth it progressively rather than slapping the full adhesive surface down at once. Use a suitable squeegee or plastic card to aid in this process.
- Watch for trapped air, creases, and folds as you go.

Gradually peel away the backing and smooth the sticker onto the surface to help prevent trapped air.
For more guidance on preparing artwork and choosing sticker options for your next project, visit Stomp's Artwork Resource Center.
When It Makes More Sense to Replace a Sticker
There might come a time when a bubble is beyond fixing. Sometimes you just have to start over. Here are a few instances when replacement may be the more sensible solution:
- If there is debris trapped, lifting up the sticker may be the only possible fix, which can affect the bond of the adhesive.
- A permanent crease has developed on the substrate (the printed sticker material).
- Repair attempts or repeated reapplication have compromised the overall sticker application.
- The sticker was damaged too much when you tried to fix the bubble.
- You've reached the point where continuing to fiddle with the sticker is probably going to make things worse.
Stomp Tip: Having trouble removing a sticker? Forget scratching it out! Check out our guide to removing stickers and sticker residue on different types of surfaces.
Remember the Steps
When bubbles occur, just remember to diagnose the problem first and make sure that bubble is actually an air bubble. Start with the least invasive option, and know when it's time to abandon fixing the problem. Then, use the sticker application tips to help prevent bubbles in the first place.
Get Your Next Batch of Custom Stickers
Choose your sticker style, size, material, and quantity, then upload or create your artwork and review your proof before ordering. Quick and easy!
Article Updated: | Originally Published:
- Tags: Stickers
- Lee Thompson