Design 101: How to Resize Images for Printing

You've poured hours into designing the perfect image, only to discover it doesn't fit your desired print format. Frustrating, right?
Fortunately, resizing images for printing is a straightforward process once you understand the basics. By learning a few simple techniques and discovering the right tools, you can adjust your image’s dimensions with ease — and without the need for cropping. Ready to make your work look as good on paper as it does on your screen? Let’s dive in.

Before You Resize: DPI
Ever wonder why some printed images look super sharp while others are, well, kind of blurry? The magic lies in something called dots per inch, or DPI. DPI measures the number of pixels needed for one inch of printed paper.
The higher the DPI, the sharper the image. Most print-ready artwork requires a DPI of at least 300 to get that clear, crisp output. Stomp’s easy-to-use design tool automatically calculates DPI, alerting you if your image falls below quality thresholds.

How Image Quality Impacts the Final Print
The quality of your original image really matters when it comes to how your final print turns out. If the DPI is too low, your image might end up looking pixelated or blurry, especially if you’re trying to print it larger than what the image’s resolution can handle.
That’s why it’s important to make sure your image has enough DPI for a sharp, high-quality print. Without making the right adjustments when resizing a low-res image, you’re likely to see some pretty disappointing results. Ultimately, vector art is the easiest to work with since you won't have to worry about low resolution bogging you down.

How to Resize Images for Printing
Adjusting your artwork to the right size for printing doesn’t have to be tricky. Here’s a quick guide to how to resize an image for printing without cropping it — plus a few tools and tips to help you along the way.
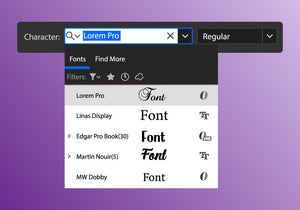
Choose Your Design Tool
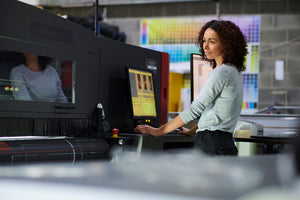
There’s a variety of design tools out there you can use to resize images, from high-end software like Photoshop and InDesign to more user-friendly options like Canva and Stomp’s very own design tool. There are also plenty of free image resizer tools on the internet. Explore these options to figure out which one is right for you in terms of features and cost.
Use the Resize Tool
Handy resize tools allow you to tweak your project's dimensions by specifying the size in pixels or other units like inches or centimeters. To use it, simply select the resize option in your software and enter the desired dimensions.

Maintain Ratio
The key to crystal clear prints? Keeping the aspect ratio consistent when resizing an image. This prevents the image from being stretched out of shape. By maintaining the original ratio, your resized image will look just as good as the original.
Pro tip: Most design tools have a “lock aspect ratio” feature so you can maintain your image’s proportions without extra effort.
Finalize Your Design with Stomp
Understanding the basics of DPI and using the right tools can make a big difference in the quality of your printed images. Thanks to Stomp’s intuitive design tool, resizing images for printing is a breeze. Our nifty tool lets you know if your image doesn’t meet quality thresholds so you can focus on what really matters — perfecting your project!
Get started today with Stomp.
- Nashira Edmiston