Turn Your Pet’s Portrait Into a Custom Sticker

There’s nothing like showing off your love for your pet, and what better way to do that than by turning your furry friend’s portrait into a custom sticker?
Whether you want to stick them on your laptop, water bottle, or even hand them out to friends, custom pet stickers are a fun and creative way to celebrate your pet. And guess what? You don’t need to be a design pro to make it happen.
With Stomp’s easy-to-use design tool, you can upload a picture of your pet and turn it into a unique sticker in just a few simple steps.
Let’s walk through how you can transform your favorite pet photo into custom stickers that are perfect for personalizing anything, from your car to your coffee mug.
Step 1 – Choose Your Material
The first step in creating your pet sticker masterpiece is choosing the right vinyl material for your stickers. At Stomp, we offer several materials to make your pet’s portrait pop:
- White Vinyl: Our standard material with a glossy finish for a vibrant, professional look.
- Matte: A smooth, non-shiny finish for a sleek look.
- Glitter: Add a little sparkle to your pet’s portrait! Perfect for adding extra flair.
- Clear: Want your sticker to blend in seamlessly with whatever you stick it on? Clear vinyl is the way to go.
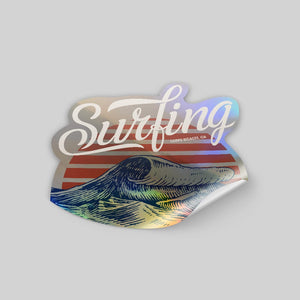
- Holographic: Looking for something bold and eye-catching? Holographic vinyl reflects different colors as you move it, making your pet sticker truly stand out.
- Mirror: A chrome finish that looks like a mirror, for a bold, shiny effect.
Pick the material that best fits the vibe you want for your custom pet stickers. Whether you want something subtle or bold, you’ve got options.

Step 2 – Choose the Shape and Size
Next up, you’ll choose the shape of your sticker. With custom stickers from Stomp, you have a few great options:
- Custom Die Cut Pet Stickers
- Circle Pet Stickers
- Oval Pet Stickers
- Square Pet Stickers (square or round corners)
- Rectangle Pet Stickers (square or round corners)
These classic shapes work great with any design. If you want your sticker to have a bit more structure, go with a square or rectangle. If you want something softer and rounder, opt for an oval or circle shape. You’re in control of the look!
After selecting your shape, you’ll also pick the size that fits your needs. Whether you’re looking for small pet stickers to slap on your phone case or larger ones to stick on your car window, Stomp has you covered.
Once you’ve chosen the material, shape, and size, you’ll see the pricing based on your quantity. The best part? There are no surprises—what you see is what you get, and we’re all about giving you straightforward pricing right from the start.
Step 3 – Upload Your Pet’s Photo and Start Designing
Now for the fun part—uploading your pet’s photo! Once you’ve selected your material, shape, and size, click the “Design Now” button. This will take you to Stomp’s simple, yet powerful, design tool. Don’t worry—no graphic design experience is needed here!
Here’s how to get started:
- Click “Upload Image” to add your pet’s photo from your computer or phone.
- You’ll see your pet’s image on the sticker layout. Now, you can play around with the size, positioning, and even add some text if you want.
- Want to make your pet sticker even more unique? Use our tool to resize, rotate, or move the image around the sticker until it looks just right.

Step 4 – Remove the Background for a Clean Outline
Don’t want the cluttered background from your photo? No problem! One of the coolest features of Stomp’s design tool is the ability to easily remove the background and get a clean outline of your pet’s portrait. Here’s how to do it:
- After uploading your photo, click the “Edit” button.
- Then, click on “Background” and select “Remove Background”.
Boom! The tool will automatically remove the background, leaving just the outline of your pet. This is perfect for creating a clean, professional look that makes your custom pet stickers stand out.
Step 5 – Final Review and Add to Cart
Once you’ve removed the background and made any final adjustments to the size or positioning of your pet’s portrait, take a moment to review your design. Does everything look the way you want it to? Great!
If you’re happy with the way your pet stickers look, it’s time to hit the “Add to Cart” button. You’ll be able to review your order one more time before checkout to make sure everything’s just right.
Why Create Custom Pet Stickers?
So, why should you create custom pet stickers in the first place? Well, for one, they’re a fun way to show off your pet’s personality. Whether you have a playful puppy, a cuddly cat, or even a quirky bird, custom pet stickers give you a creative way to celebrate your pet. Plus, they make great gifts for family and friends who adore your furry (or feathered) companion as much as you do.
Not only that, but custom pet stickers are super versatile. Stick them on your laptop, water bottle, or even your car. They’re durable, waterproof, and weather-resistant, so they’ll last wherever you put them.
Stick Around with Your Pet’s Custom Portrait
Turning your pet’s portrait into a custom sticker has never been easier! With Stomp’s user-friendly design tool, you can upload a photo of your pet, remove the background, and create a clean, custom outline.
Choose your material, shape, and size, and get ready to show off your custom pet stickers everywhere.
Ready to start? Head over to our pet stickers page to begin designing your unique stickers today. Your pet’s portrait deserves to be everywhere—so why not stick them on everything?
- Tags: Guides Pet Products Stickers
- Nashira Edmiston

